
Simple Manual Exposure Blending Tutorial in Photoshop And my Usual Workflow!

In this video, I share a simple, quick and easy exposure blending technique to combine two exposures into one image in Photoshop! I also run through my usual workflow process beginning with Capture One Pro, then Photoshop and Lightroom post process editing.
C1Pro v.12
I start off all my edits in Capture One. You actually don’t have to use C1, Lightroom is sufficient for most purposes but for my personal preference, I find that C1 is much better at certain tasks than Lightroom. Since this video is a tutorial on my usual workflow, I’m going to use C1 here. The manual blending can still be done in Photoshop later regardless of whether you use C1 or Lightroom to prepare the images.
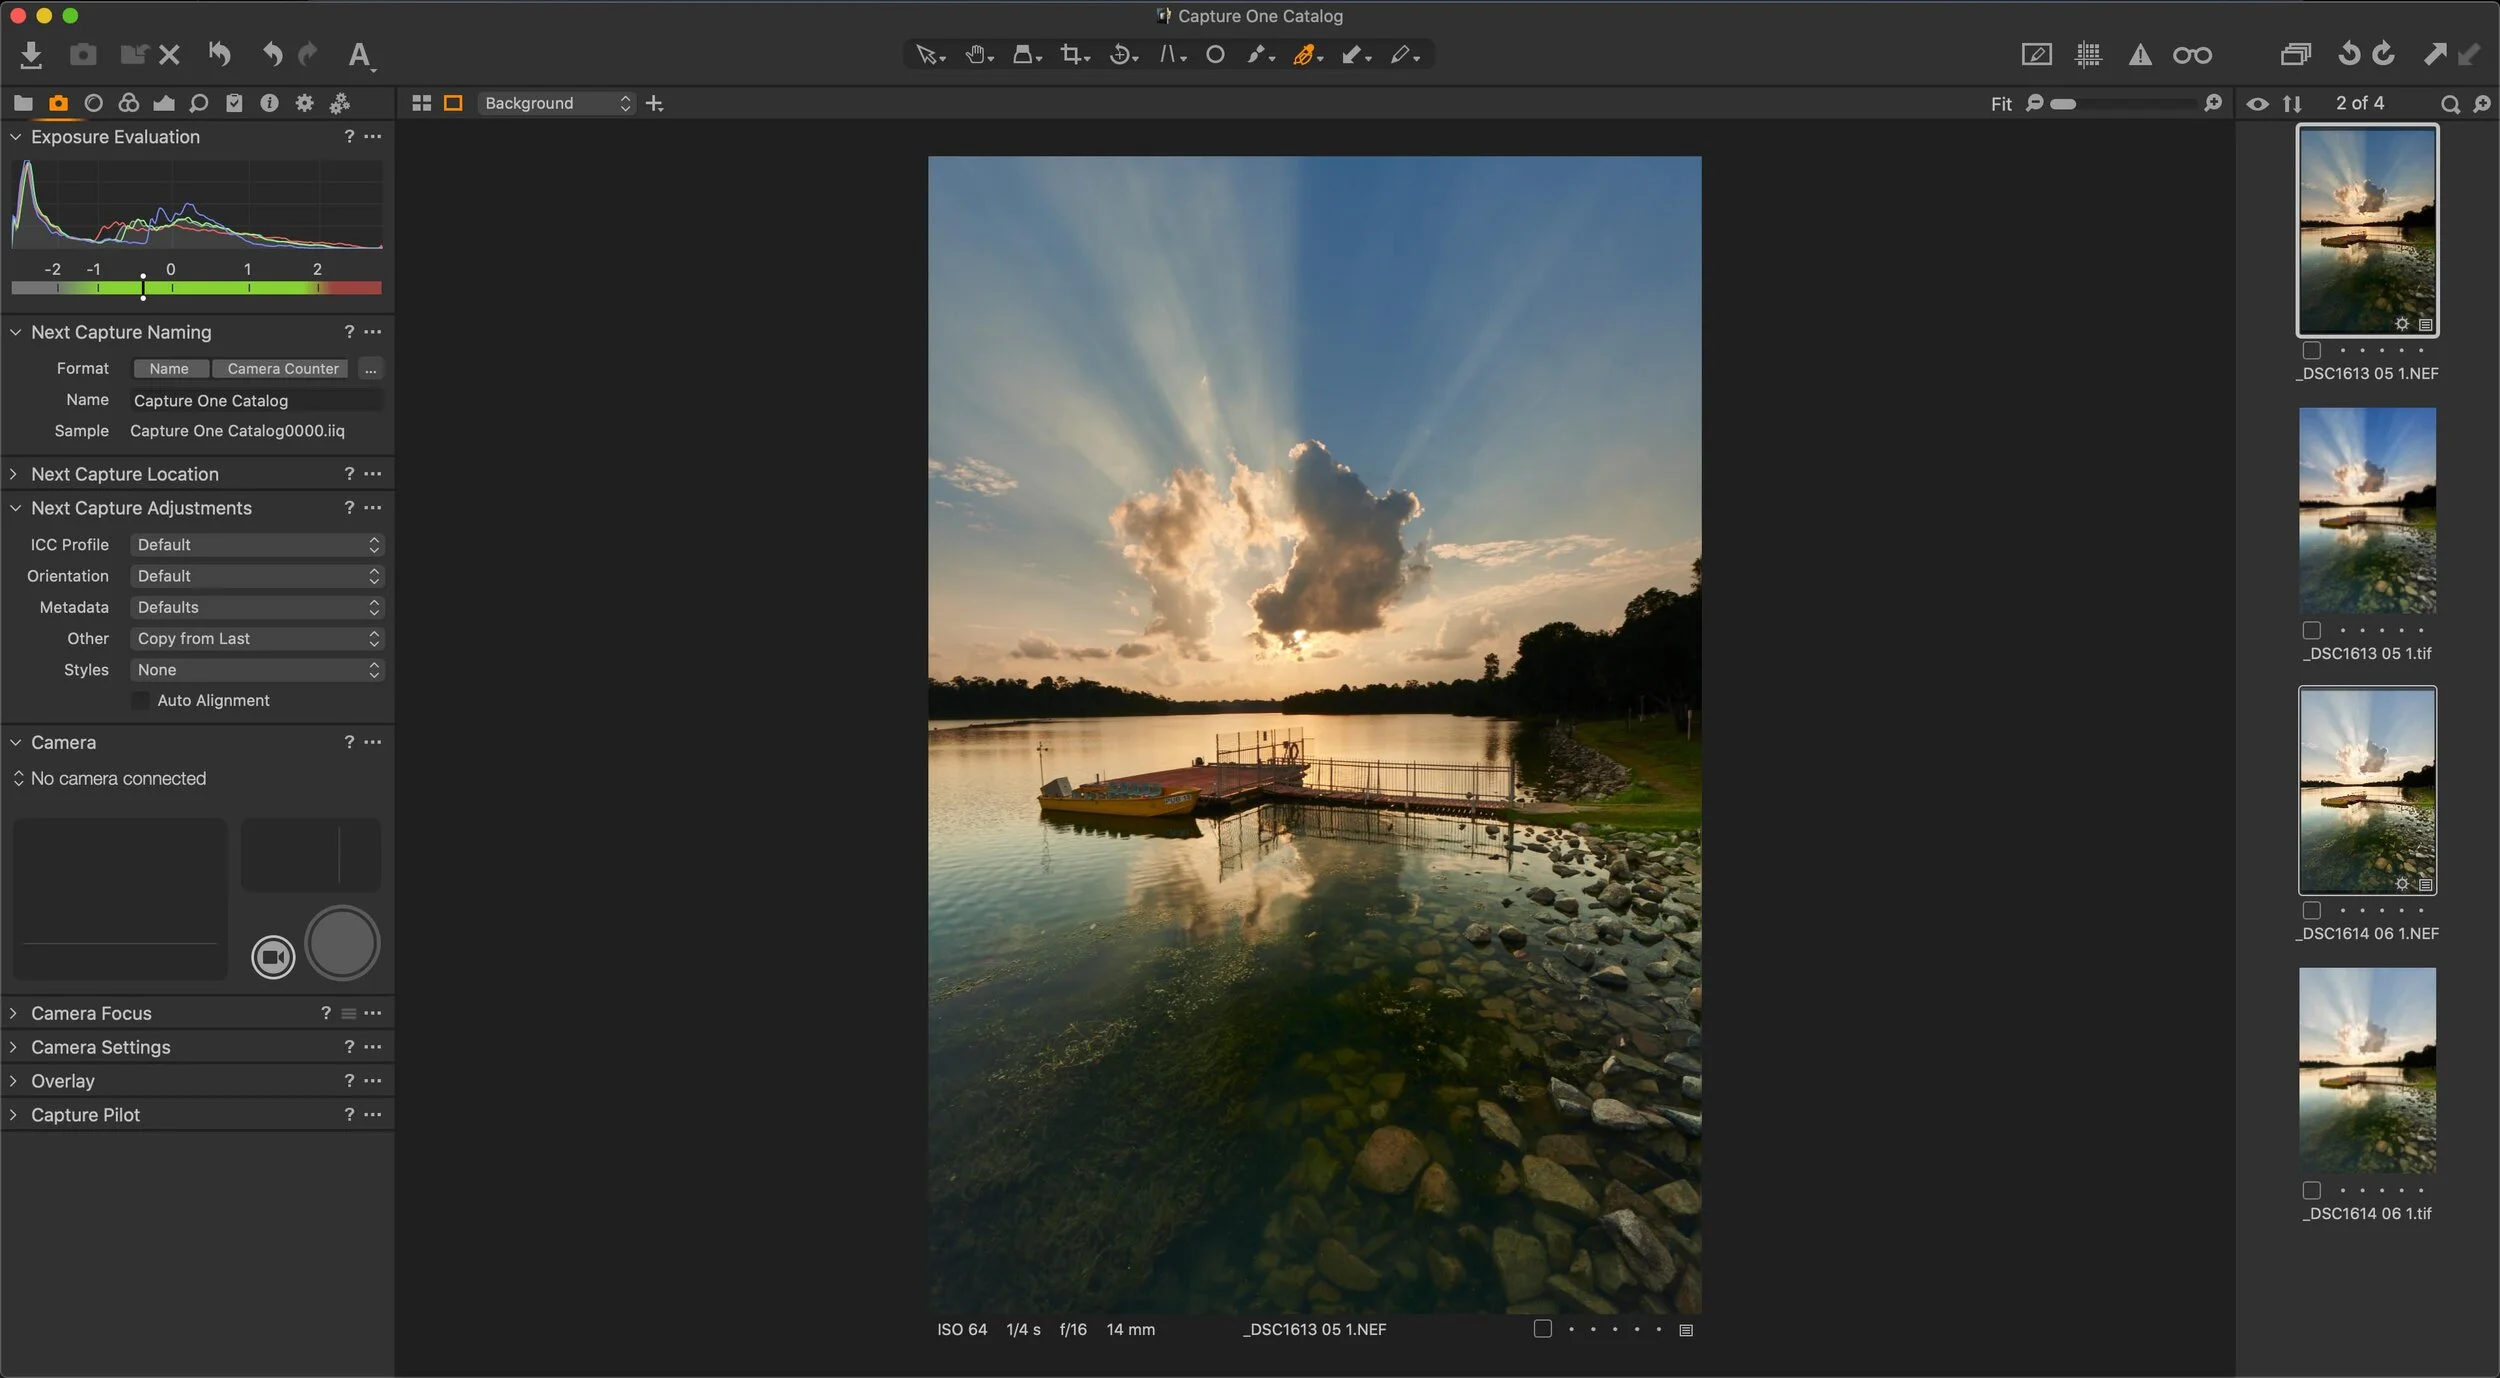
My raw converter of choice, C1Pro. This is not the latest version of Capture One available.
Start off with the lens corrections panel in Capture One.

Lens Corrections is a power tool to correct flaws in your image such as vignetting, CA and distortions.
Adjust “Distortion”, “Sharpness”, “Light Falloff” and “Purple Fringing” to your preferences. “Sharpness” here does not refer to overall sharpness, but rather sharpness falloff towards the corners of the image. Likewise, “Light Falloff” refers to vignetting at the corners of the image.

The exposure panel in C1 looks similar to the develop module in Lightroom and performs mainly the same functions.
Adjust the settings here to suit your image. C1pro’s “Highlight and Shadow” recovery sliders here do an awesome job of recovering detail. I am particularly impressed with the “Clarity” sliders because you can really add a lot of detail to the image, and it does not make the image noisy or grainy like the clarity slider in Lightroom does. It looks really good even when you pump it up high.

The Linear Gradient Mask is a very useful tool for selectively manipulating a specific part of the image.
Next, I want to selectively increase the saturation in the sky without affecting the rest of the image. Using the Linear Gradient Mask tool, I draw out a portion of the sky to selectively change the saturation values. As you can see in the image above, only the portion overlaid in red is affected by the mask.
When I’m done with the adjustments, I simply Copy + Paste the settings over to all the images I wish to apply the same settings to. Once I’m happy with the changes, I export the images to Photoshop.
Manual Blend in Photoshop
Make sure that both images are in the same document by dragging one of the images into the other. Hold down “Shift” so that Photoshop will align the images. Since I used a tripod, the images should line up perfectly.
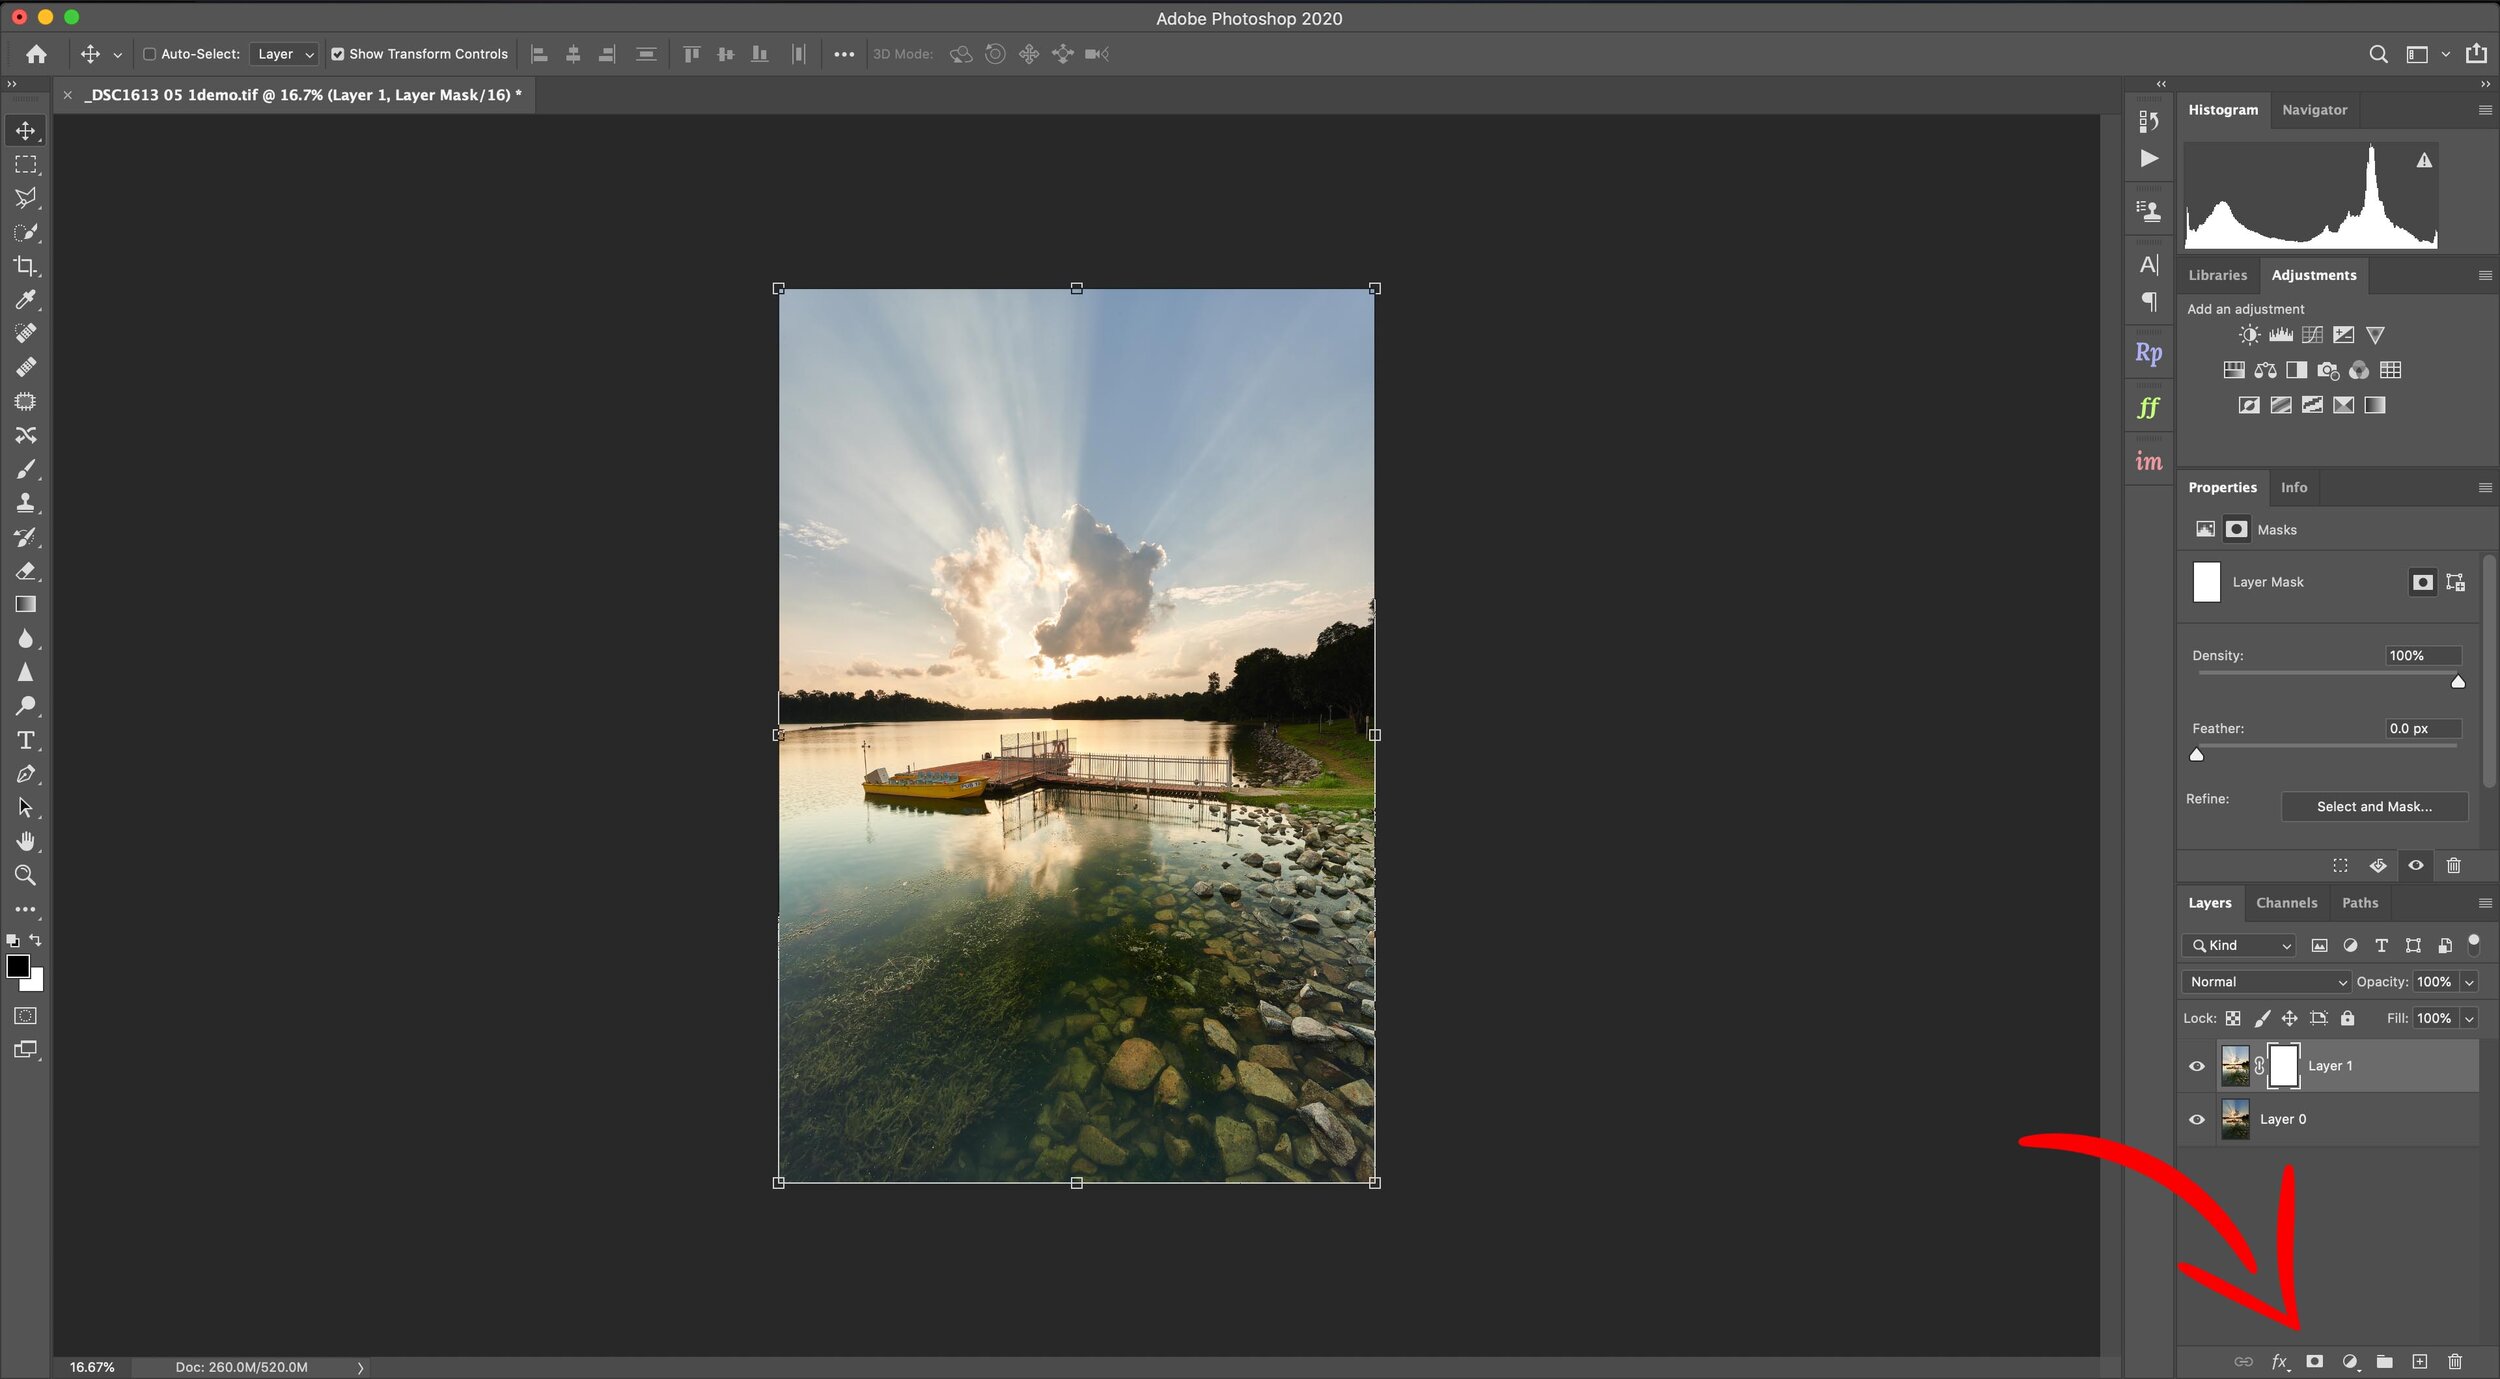
Create a layer mask in Photoshop
With the exposure of the rocks as the top layer, create a layer mask by clicking on the “Add layer mask” button. Select your brush tool, make sure the foreground colour is black and paint everything out, leaving on the portion with the rocks.

Select the brush tool and start brushing away the parts of the image you don’t want to see.
Once you’ve brushed out the parts of the image you don’t want to use, you should have an image with a relatively balanced exposure.

What it looks like after blending.
The manual blend is complete. This technique works especially well for scenes like these, where there are no buildings or complicated objects between the blended areas. If you’re dealing with those, you might need a dedicated blending app or have some knowledge of luminosity masking. Depending on demand, I may make a tutorial for one of those in the future. As promised, this is a very basic and easy manual blend method that all photographers should have knowledge of.
From here on, just edit the image as normal. I continue the processing in Nik Color Efex, and apply an Orton Blur and High Pass Filter.
Here’s the final image:

Love the details underwater in the rocks as well as the sun rays.
Hopefully this tutorial has been beneficial to you. Do let me know your thoughts in the comments below!